
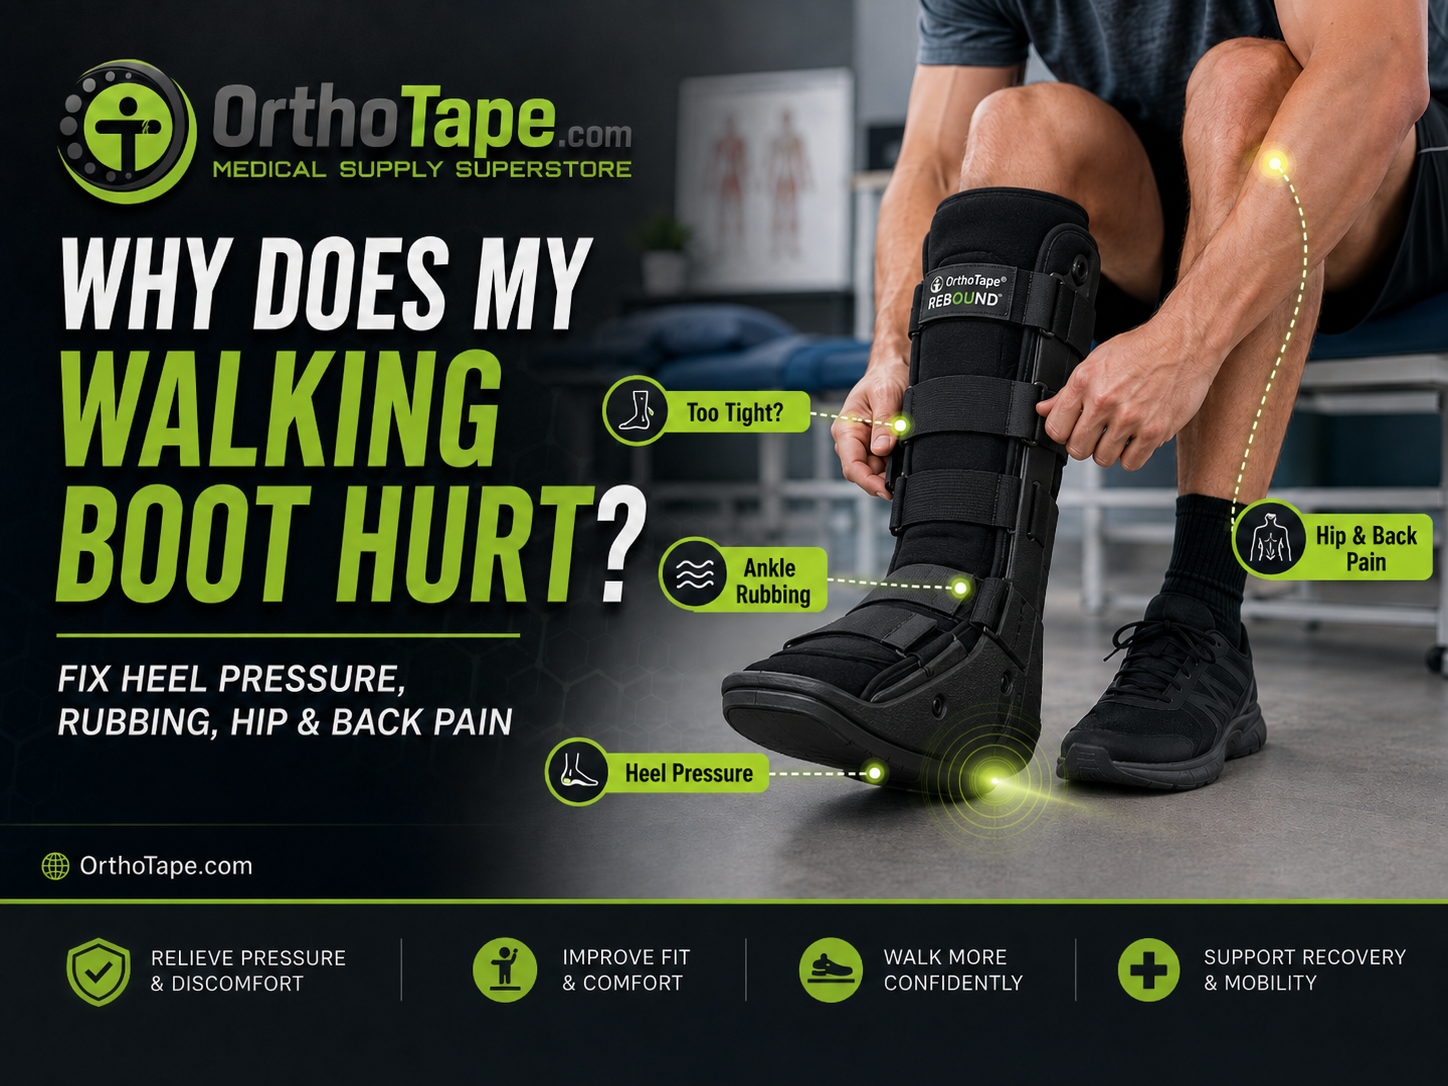
Why Does My Walking Boot Hurt? How to Fix Heel Pressure, Rubbing, Hip and Back Pain
A CAM walking boot is designed to protect an injured foot or ankle, but it can create new discomfort when the heel is not seated, the liner shifts, pressure is uneven, swelling changes or the raised sole alters the way you walk. This guide explains what to check, what not to change on your own and which symptoms require prompt medical advice.

FIT PROBLEMS: heel lift, rubbing, tight straps and shifting liners

GAIT PROBLEMS: uneven leg height and altered hip or knee mechanics
Is Walking Boot Discomfort Normal?
A new boot can feel bulky and unfamiliar, but pain should not be dismissed simply because the device is medically necessary. Össur's Formfit Walker instructions direct patients to contact a healthcare professional if pain, skin irritation or excessive pressure occurs. The same instructions state that the heel should be fully seated, the side struts should be centered over the ankle and there should be no gap behind the heel. Review the Össur Formfit Walker instructions.
General snugness
The boot feels firm and unfamiliar, but the skin remains normal and discomfort improves after an approved fit adjustment.
Localized pressure
One spot at the heel, ankle bone, shin or boot edge feels sharp, hot, burning or like a new shoe creating a blister.
Circulation or clot symptoms
A cold, pale or blue foot, persistent numbness, severe swelling, calf or chest pain, or sudden shortness of breath needs prompt evaluation.
Walking Boot Pain Troubleshooting Table
| Problem | Common Fit or Use Issue | What to Check | When to Contact the Clinician |
|---|---|---|---|
| Heel pressure or heel pain | Heel not fully seated, liner flattened, foot sliding or concentrated pressure beneath the heel | Gap behind heel, folded liner, boot size, strap balance and sole wear | Persistent redness, burning, blister-like pain, skin breakdown or worsening pain |
| Ankle or shin rubbing | Exposed plastic edge, shifted liner, off-center strut, twisted strap or oversized boot | Confirm all plastic is covered and fabric lies flat | Redness that persists, drainage, odor, blistering or a hot localized spot |
| Boot feels too tight | Swelling increased, straps overtightened or air cells overinflated | Elevation, strap pressure and model-specific air release procedure | Numbness, color or temperature change, severe swelling or pain that does not settle |
| Boot feels loose | Swelling decreased, liner compressed, wrong size or heel not seated | Heel lift, forefoot movement, liner wear and calf fit | Boot cannot be stabilized without painful tightening or the foot repeatedly slides |
| Hip, knee or back pain | Artificial leg-length difference, reduced ankle motion or abnormal gait | Opposite shoe height, prescribed weight bearing, crutch use and walking pattern | Pain persists, worsens or changes the way you can safely walk |
| Moisture, odor or itching | Wet liner, sweat accumulation, inadequate drying or worn liner material | Skin condition, liner cleanliness and approved washing instructions | Drainage, fever, open skin, offensive odor or signs of infection |
Why Your Heel Hurts in a Walking Boot
1. The heel is not fully seated
The most important fit check is the heel position. The heel should sit against the back and bottom of the shell before the liner, front panel and straps are closed. A gap allows the foot to slide, which can create repeated friction behind the heel and pressure beneath the foot.
2. The boot is too large or has become loose
CAM boots cover a range of shoe sizes rather than one exact size. A patient near the small end of the range may have more internal space. Swelling can also decrease during recovery, allowing the foot and heel to move more than they did initially. Tightening every strap aggressively is not always the correct solution because that may create new pressure at the shin or ankle.
3. The liner has folded, shifted or lost cushioning
A liner that bunches under the heel or pulls away from the plastic shell can concentrate pressure. A worn liner may also become compressed and less protective. OrthoTape carries model-specific replacements in the medical cast boot liner collection.


Why the Boot Rubs Your Ankle, Shin or Calf
Rubbing usually means two surfaces are moving against each other or a rigid edge is pressing through the liner. University College London Hospitals advises patients to make sure the liner covers all plastic, inspect the skin regularly and report rubbing, burning or blister-like discomfort before it progresses to a pressure ulcer. Read the UCLH walking boot safety guidance.
- At the ankle bones: the struts may be off-center, the heel may be forward or the liner may have shifted.
- At the shin: the front panel may be positioned too high or the upper straps may be overtightened.
- At the calf edge: the boot height, calf circumference or liner overlap may not match the leg.
- Across the top of the foot: the forefoot strap may be too tight, swelling may have increased or the foot may not be flat in the liner.
How Tight Should a Walking Boot Be?
The boot should be snug enough to keep the heel seated and limit unwanted movement, but not so tight that it causes numbness, tingling, color change, burning or increasing swelling. The goal is stable contact—not maximum strap tension.
On the Aircast AirSelect Standard, Enovis instructs the patient to position the heel at the back, wrap the liner, replace the front panel and secure the straps until snug and comfortable. Air-cell pressure can be reduced for comfort when sitting or reclining and increased for support while walking, as directed. View the AirSelect Standard patient application guide.

Pneumatic Air Cells: Too Much or Too Little Pressure
Air cells help accommodate swelling changes and improve contact around the ankle. They should not be used to force an oversized boot to fit or to eliminate all movement by creating painful pressure.
Too much air
The boot may feel increasingly tight, burning or numb. Release pressure according to the model instructions and reassess the skin and circulation.
Too little air
The ankle may feel unsupported and the heel may move. Confirm that the foot is seated and the straps are correct before adding air gradually.
Uneven air
Some boots use separate air cells. Follow the selector or valve instructions so compression is balanced and directed to the intended area.

Why Swelling Makes the Fit Change During the Day
Foot and ankle swelling can rise and fall throughout recovery. A boot that felt secure earlier may become tight later, or it may loosen as swelling decreases. Reassess the fit after elevation, activity, changes in bandaging or any approved liner removal. Do not change the prescribed weight-bearing status or discontinue the boot because the fit changed.
A pneumatic model such as the Aircast AirSelect Standard Tall or Ossur Rebound Air Tall allows compression to be adjusted as swelling changes. A non-inflated boot uses fixed foam and strap tension instead.
Can a Walking Boot Cause Hip, Knee or Back Pain?
Yes. A CAM boot raises the injured side and restricts normal ankle motion. That artificial leg-length difference can change step width, stride, hip motion and knee loading. A 2025 gait study found that adding a full-length lift to the opposite shoe restored some—but not all—hip and knee mechanics toward normal levels. Review the controlled walking-boot and shoe-lift study.
A second prospective gait study also found meaningful changes in walking patterns and joint forces when participants used a tall CAM boot, including the highest measured hip force in the boot-only condition. Read the CAM boot gait study.
Ways a clinician may address gait-related discomfort
- Confirm that the boot height and size match the injury and leg.
- Recommend a stable shoe on the opposite foot with an appropriate sole height.
- Evaluate a full-length external shoe balancer when appropriate.
- Temporarily use crutches to reduce painful loading or improve balance.
- Correct a short, uneven or side-to-side walking pattern.
- Review whether the patient is actually cleared for full weight bearing.
The boot's medical purpose comes first. Do not switch from a tall boot to a short boot solely to reduce hip discomfort without approval. The height determines how much of the ankle and lower leg is immobilized. For selection differences, see OrthoTape's short versus tall walking boot guide.
How Boot Design Can Affect Comfort
Different walking boots use different shell heights, toe designs, soles, liners and compression systems. The best device is the one prescribed for the injury and fitted correctly—not automatically the softest or shortest option.


Socks, Skin Checks and Liner Care
Follow the clinician's instructions about removing the boot and using a sock. When a sock is allowed, use a clean, dry, smooth sock that does not bunch under the heel or form a thick ridge at the toes. Inspect the skin at the heel, ankle bones, shin, calf edge and forefoot.
Manufacturer instructions generally call for hand washing the removable liner with mild detergent and air drying it completely. Heat, tumble drying and reinserting a damp liner can damage the materials or increase skin problems. Replace a liner that is damaged, permanently flattened, unable to hold air or no longer fits the shell correctly.
How to Refit a Walking Boot to Reduce Pressure and Rubbing
These are general checks, not a substitute for the fitting instructions for your model. Do not remove the boot, change dressings, alter wedges or bear weight unless the treatment plan permits it.
- Sit down and inspect the skin and liner. Remove the boot only when your treatment plan permits. Check the heel, ankle, shin and edges of the foot for redness, burning, blisters, drainage or pressure marks. Make sure the liner is clean, dry and not folded.
- Deflate pneumatic air cells before reapplying. For an air boot, release the air as directed by the manufacturer before putting the boot back on. This helps the heel seat fully and prevents excessive compression during reapplication.
- Seat the heel fully at the back of the boot. Place the foot into the open liner while seated and move the heel firmly against the back and bottom of the shell. The foot should not be perched forward or leave a gap behind the heel.
- Smooth and close the liner. Wrap the liner around the foot and lower leg without wrinkles. Confirm that padding covers all plastic edges and that no strap, seam or sock is folded beneath the foot or ankle.
- Position the front panel and struts. Center the front panel and side struts according to the product instructions. Plastic components should not touch bare skin, and the struts should remain aligned along the lower leg and ankle.
- Fasten the straps in the manufacturer's sequence. Tighten the straps until the boot feels snug and stable, not painful. Use the sequence specified for the model because Aircast, Ossur and DeRoyal boots do not all use the same strap order.
- Inflate gradually and recheck after standing. Add air a little at a time until the ankle feels supported. Stand or walk only if weight-bearing is permitted, then recheck heel position, rubbing, circulation and comfort. Release air or contact the treating office if pressure becomes painful.
When Crutches May Still Be Necessary
A boot does not automatically mean full weight bearing. Some patients are non-weight-bearing, partial weight-bearing or weight-bearing only as tolerated. Crutches may also be used temporarily when pain, balance or gait quality makes walking unsafe. Follow the exact plan provided by the clinician.
Browse OrthoTape's forearm crutches and underarm crutches when a mobility aid has been recommended. The crutch height and handgrip must be fitted correctly to avoid creating a second set of pressure and posture problems.
Warning Signs: Stop Troubleshooting and Call
- Burning, blister-like rubbing or a pressure point that persists after an approved refit
- Redness that does not fade, drainage, wet staining, odor or broken skin
- New numbness, pins and needles, a cold foot or color change
- Rapidly increasing swelling or pain that is out of proportion
- A cracked shell, failed strap, damaged air cell or boot that no longer holds the prescribed position
- Calf or thigh pain, chest pain or sudden shortness of breath
What If a Walking Boot Is Not the Best Option?
Some walking-boot problems can be corrected by reseating the heel, adjusting the liner, changing strap tension or correcting a leg-length difference. However, a removable boot may not be the best form of protection for every fracture or patient.
When strict, continuous immobilization is important—or when the boot repeatedly loosens, shifts, causes pressure problems or is removed too often—ask your orthopedic provider whether a properly applied short leg cast may offer more consistent protection. A cast is custom-molded to the limb and remains in place, while a walking boot depends on correct fit, strap adjustment and patient compliance.
Read our detailed comparison: Walking Boot vs. Cast: Which Provides Better Fracture Protection?
Shop Walking Boots and Replacement Liners
Aircast AirSelect Standard Tall
A tall pneumatic boot with adjustable air cells, three closure straps and a rocker sole for clinician-directed ankle and foot recovery.
View AirSelect Standard
Ossur Rebound Air Tall
A closed-toe tall CAM boot with adjustable pneumatic compression, ventilated panels and a dual-density rocker sole.
View Rebound Air Tall
DeRoyal One Piece Samson Walker
A low-profile airless CAM walker with a narrow base and two-layer memory-foam inlay, available in standard and low-top versions.
View Samson Walker
Ossur Rebound Air Short
A lower-profile closed-toe pneumatic boot for clinician-selected forefoot, toe and metatarsal recovery when tall-boot control is unnecessary.
View Rebound Air Short
Rebound Air Tall Replacement Liner
A genuine model-specific liner for replacing a worn, soiled or damaged liner in the Ossur Rebound Air Tall boot.
View Tall Liner
Formfit Air Short Replacement Liner
A genuine replacement liner with an integrated air bladder for the Formfit Air Short boot. Match the exact model and size.
View Short LinerBrowse all medical CAM walking boots, compare pneumatic air cast boots, review non-inflated medical boots, or shop replacement boot liners and socks.
A walking boot is not always the correct immobilization choice. When compliance, custom molding or continuous protection is more important, the treating clinician may recommend a cast. Review OrthoTape's walking boot versus cast guide for that separate treatment decision.
Frequently Asked Questions
Why does my heel hurt in a walking boot?
Heel pain can occur when the heel is not fully seated against the back of the boot, the foot slides inside an oversized boot, the liner is folded or flattened, the straps are uneven, or pressure is concentrated beneath or behind the heel. Remove the boot only as permitted, inspect the skin and liner, and contact the treating office if there is persistent redness, burning, blister-like pain or worsening heel pain.
How tight should a walking boot be?
A walking boot should feel snug and supportive without causing numbness, tingling, burning, color change, increasing swelling or sharp pressure. Straps and pneumatic air cells should be adjusted only enough to stabilize the foot and ankle in the prescribed position.
Should my heel lift inside a walking boot?
A small amount of movement may occur with some models, but the heel should remain seated against the back and bottom of the liner rather than repeatedly lifting or sliding. Noticeable heel movement can indicate an incorrect size, loose liner, uneven straps, insufficient air-cell support or an improperly seated foot.
Can a walking boot cause hip, knee or back pain?
Yes. A tall CAM boot raises one side and restricts ankle motion, which can alter walking mechanics and load the hips and knees differently. A clinician may evaluate footwear, gait, crutch use or a full-length lift on the opposite shoe. Do not add a lift or change weight-bearing status without clinical guidance.
How can I stop a walking boot from rubbing my ankle or shin?
First confirm that the heel is fully seated, the liner covers every plastic edge, the struts are centered, the fabric is smooth and the straps are not twisted. Use only pads or accessories supplied or approved for the specific boot. Persistent rubbing, burning or blister-like pain should be reported promptly.
Can I put extra padding inside my walking boot?
Do not place improvised objects, folded towels or loose materials inside the boot. Some manufacturers provide specific fitting pads that may be positioned according to their instructions. Extra material can create a new pressure point or change the prescribed fit, so confirm any modification with the clinician or device instructions.
Should I wear a sock under a walking boot?
Follow the treating clinician and manufacturer instructions. When a sock is permitted, it should be clean, dry, smooth and tall enough to protect the skin from the liner without bunching. Thick or folded socks can change the fit and create pressure.
When should I stop using the boot and contact my doctor?
Seek prompt advice for new numbness, pins and needles, a cold or discolored foot, severe or increasing pain, burning, blister-like rubbing, drainage, odor, persistent redness, rapidly increasing swelling, damaged boot components or symptoms that do not improve after elevation and an approved fit adjustment. Calf or chest pain and sudden shortness of breath require urgent evaluation.
Clinical and Manufacturer References
- Enovis: Aircast AirSelect Standard Patient Application Guide
- Össur: Formfit Walker and Formfit Walker Air Instructions for Use
- University College London Hospitals: Walking Boot Advice for Patients
- Foot & Ankle Orthopaedics: Impact of Contralateral Shoe Lifts on Gait With a CAM Boot
- Foot & Ankle Orthopaedics: Gait in a CAM Walker Boot Using a Contralateral Shoe Lift